|
Edea > Montáž korčuľového noža | Montage of an ice blade | Assembly Of An Ice Blade on EDEA BOOTS
This operation should be performed by specialized technicians only.
However, we suggest simple directions for a correct blade assembly.
We suggest to use the EDEA screws included in each pair of boots, as they are designed specifically for the material and the dimensions of the EDEA sole.
Necessary TOOLS:
- Mounting screws
- A drill bit mm 2,5
- A pen
- A drill with a bit type PH2
- A mounting stand
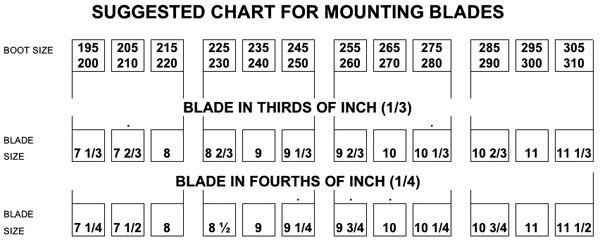
CORRECT SIZE
Check our suggestions on the following Size comparison Chart 1
STEPS:
- If you wish to activate the boot ventilation it is easier doing it before assembling the blade. To do this, drill the marked spots on the heel with a mm 2,5 bit and go deep about mm 2.
- Find the center of the sole, pen mark the center heel and toe. This operation is done by eye. Do not refer to the seam, as occasionally in lasting, the seam may be pulled slightly to one side.
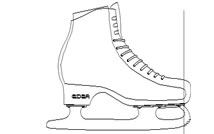
- Place the boot on a steady mounting stand (you may use the Edea stand) Place the blade on top the sole centering the runner and move it about mm 2 to the inside. If the blade is shorter than the sole, the extra boot length should be at the heel not at the toe.
- When the blade is correctly positioned mark the sole through the blade slots with a pen.
- Remove the blade and start drilling with a bit of mm 2,5. In front you drill all the way through the sole, while on the heel you drill about mm 1,5 deep.
- Place the blade on the sole and screw down slowly, so the thread grasps firmly at the sole material. Do not over screw. We recommend to mount the blade with all screws.
- Check that inside the boot there is no residual sole material. Put the insole back in place.
| 
 |
|
| 
